Outdoor adventures are more fun when your gear holds up. This article teaches practical outdoor gear repair techniques you can use on the trail or at home. It covers simple fixes, the right tools, and when to get help. Read on to build confidence in repairing outdoor gear and keep your kit ready.
Essential tools and materials
Before you start any repair, gather the right tools. Having a basic kit saves time and keeps the job clean. A small kit can make a big difference on a long trip.
Keep tools compact and versatile. Choose items that serve more than one purpose. That helps when packing light.
Below is a clear list of recommended items to include in a repair kit.
These tools cover most common problems. Pack them in a waterproof pouch so they stay dry and ready.
Regularly check and restock your kit after each trip to avoid surprises.
- Needles and thread: Heavy-duty and lighter thread for different fabrics.
- Repair tape: Nylon or polyester tape for quick fabric fixes.
- Seam sealer: For waterproof fabric seams and small holes.
- Fabric patches: Self-adhesive and sew-on patches for tents and packs.
- Pliers and multi-tool: For hardware fixes and small cuts.
- Replacement parts: Zipper pulls, buckles, cord stops, and extra cord.
Basic fabric repair techniques
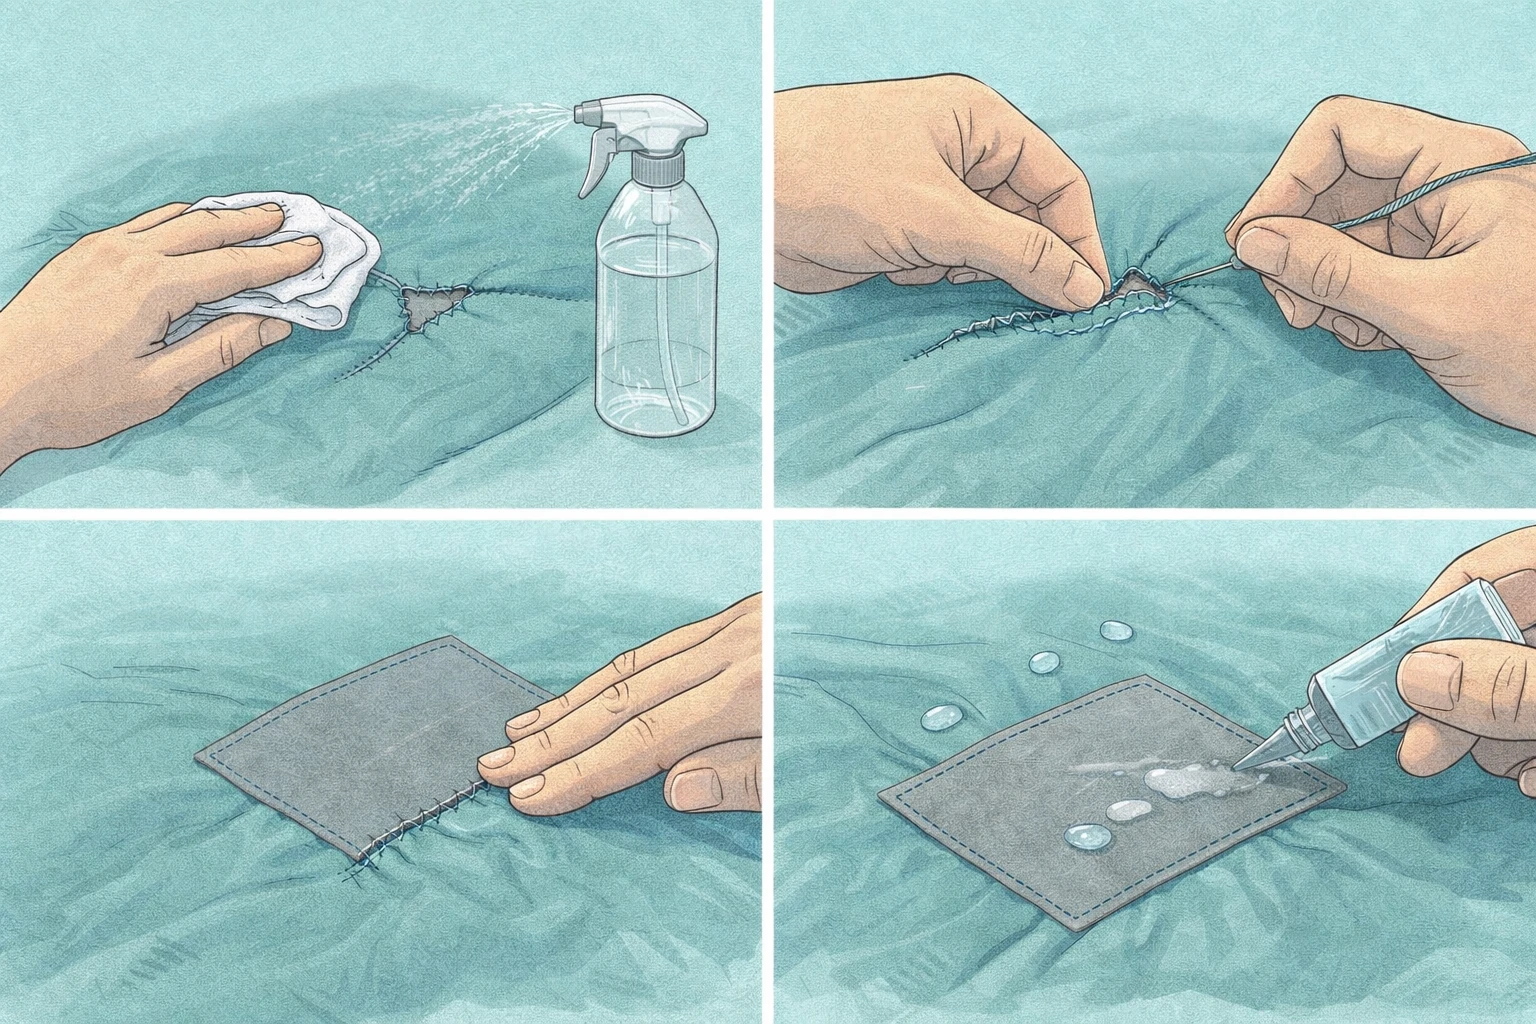
Fabric tears and holes are common. Start by cleaning the area and trimming loose threads. This makes repairs stronger and neater.
Small holes can be fixed fast with repair tape. For larger tears, combine sewing and patches. Sewing restores strength; patches restore weather resistance.
Here is a step-by-step approach to fixing rips and holes in fabric gear. Follow these steps in order for the best results.
- Clean the area: Remove dirt and dry the fabric.
- Stitch the tear: Use a simple running or backstitch to close the gap if possible.
- Apply patch: Place patch over seam and press firmly. Sew edges if fabric allows.
- Seal if needed: Use seam sealer on waterproof gear to restore protection.
When you practice these repairs at home, you get faster and neater at field repairs. That confidence matters when you are repairing outdoor gear on a trip.
Zippers and hardware fixes
Zippers and buckles fail often. They are small parts but stop gear from working if they break. Learn a few simple fixes that restore function quickly.
Begin by identifying the problem. Is the slider separated, is the pull broken, or are teeth misaligned? Each issue has a clear fix and clear tools to use.
Below are common fixes you can do with a multi-tool and spare parts in your kit. These fixes can often be done without removing the gear from use.
- Slider issues: Tighten slider gently with pliers or replace it from a kit.
- Missing pull: Use cord or a paperclip as a temporary pull.
- Broken buckles: Replace with a matching buckle or re-route cord to work around the broken part.
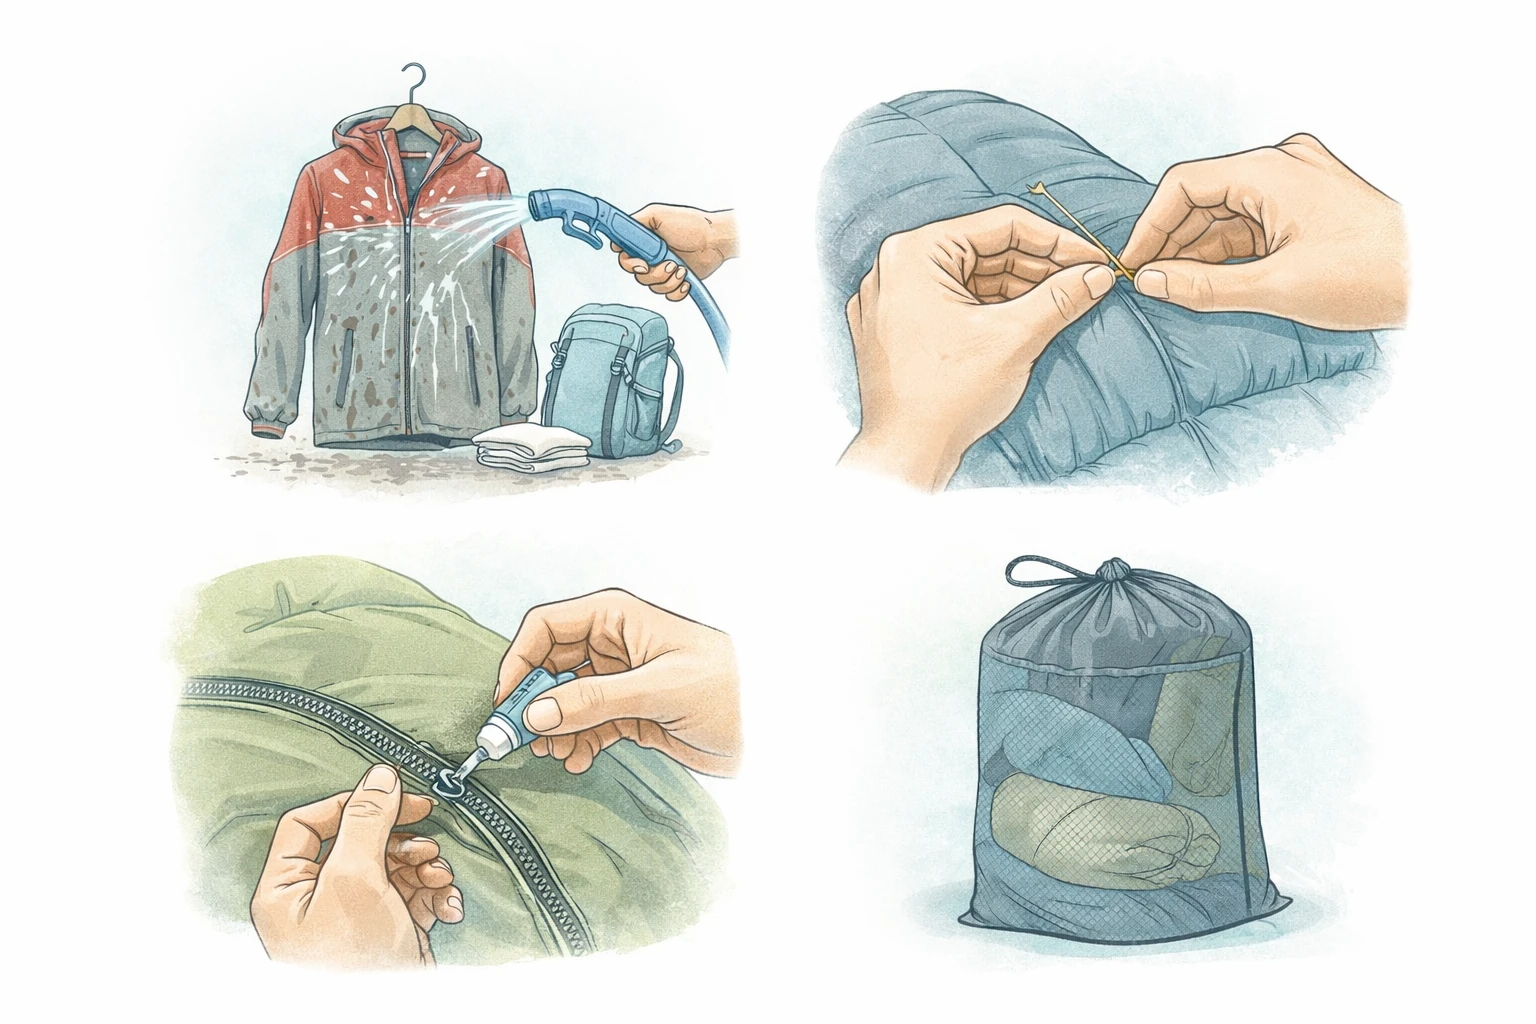
- Stuck zippers: Clean debris and apply a small amount of zipper lubricant or soap.
Keep spare buckles and a small zipper kit in your pack. These materials are light and save a lot of trouble in the field.
Tent and shelter repairs
Tents take a lot of wear. Poles, seams, and fabric need attention. Small fixes can keep you dry and safe. Learn straightforward techniques to repair shelters fast.
Poles break when stressed. A splint repair using a strong stick or a tent pole repair sleeve works well. Secure with tape and cord until you can replace the pole.
Seams and floors suffer abrasion. Use seam sealer and patches for waterproofing. Clean the area first and press patches firmly to avoid leaks.
Before pitching, inspect your tent and practice these fixes. Knowing how to repair poles and seal seams boosts confidence in rough weather.
Always test repairs at home after the trip. That lets you replace temporary fixes with long-term solutions when you return.
Maintenance tips to prevent damage
Good care reduces the need for repairs. Clean gear, store it dry, and inspect for small problems early. Small steps add up to big savings and more trips.
Routine checks catch issues before they grow. Look for wear on high-stress points like straps and zippers. Repair small problems right away to avoid larger failures.
Below is a practical maintenance checklist you can follow before and after trips. It keeps gear in top shape and lowers repair time in the field.
- Clean and dry: Remove dirt and dry gear before storage to prevent rot and mold.
- Inspect seams: Look for loose stitches and small holes to fix them early.
- Lubricate zippers: Use a small amount of lubricant to keep zippers moving smoothly.
- Store carefully: Avoid compressing down gear for long periods; use breathable storage bags.
Regular maintenance makes repairing outdoor gear easier and less frequent. It also improves safety and comfort on every trip.
When to get professional help
Some problems need expert attention. Complex fabric laminates, major structural damage, or technical equipment repairs are best left to pros. They have tools and materials that are hard to carry on trips.
If a repair affects safety, like a core pole failure in a large tent, seek professional service or replacement. A bad fix can create more risk than it prevents.
Use your judgment. If a fix takes too long, costs too much time, or seems beyond your skill, note the damage and plan a return for proper repair.
Key Takeaways
Practical outdoor gear repair techniques keep gear working and trips enjoyable. Carry a small, well-stocked kit and learn a few core skills. They save time and money and reduce stress on the trail.
Focus on basic fabric repairs, zipper and hardware fixes, and tent fixes. Practice these skills at home until you feel ready to use them in the field. Regular maintenance reduces most failures before they happen.
Remember, repairing outdoor gear is a skill you can build. Start small, keep it simple, and be prepared. Your gear will thank you and your trips will be smoother.